


Understanding Dishwasher Connections: A Comprehensive Guide
When it comes to modern kitchens, dishwashers are a blessing. They save time, energy, and a considerable amount of elbow grease. However, one crucial aspect that often goes unnoticed is the connection. Without proper installation, your dishwasher may turn from a helpful appliance into a source of frustration. In this article, we’ll explore everything you need to know about dishwasher connections, from the essential components to installation tips.
What You’ll Need for Dishwasher Connections
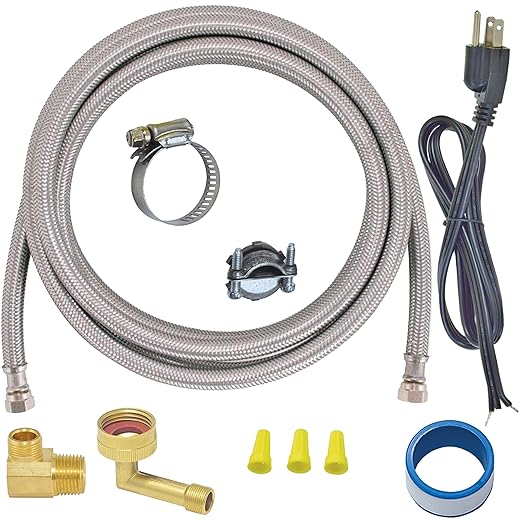
Before diving into the installation process, let’s outline the tools and materials you’ll need. Think of this as gathering your ingredients before cooking a meal—having everything ready will make the process smoother.
1. **Dishwasher**: Of course, you need the appliance itself.
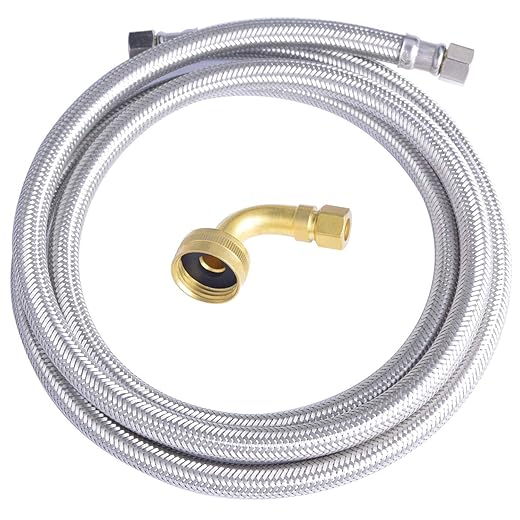
2. **Water Supply Line**: Usually a flexible braided or copper line.
3. **Drain Hose**: Essential for carrying wastewater away.
4. **Power Supply**: Ensure you have a power cord if your unit doesn’t have a built-in one.
5. **Plumber’s Tape**: To prevent leaks at the connections.
6. **Screwdriver Set**: For securing various components.
7. **Wrench**: To tighten the fittings.
8. **Level**: To ensure your dishwasher sits evenly.
Now that you have your toolkit ready, let’s get into the nitty-gritty of the connections.
Connecting the Water Supply
Connecting the water supply is akin to giving your dishwasher a lifeline. Here’s how to do it:
1. **Locate the Hot Water Supply**: This is usually under your kitchen sink. Turn off the water supply before you start working.
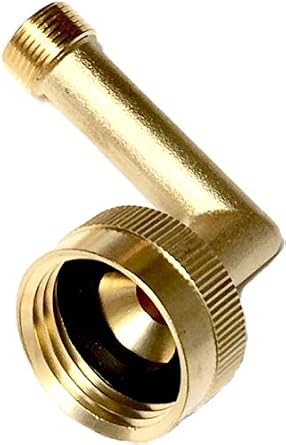
2. **Attach the Water Supply Line**: Use a wrench to connect the supply line to the dishwasher’s inlet valve. Remember to wrap plumber’s tape around the threads to prevent leaks.
3. **Turn the Water Back On**: Slowly turn the water supply back on while checking for leaks at the connection. If you see any, tighten the connection until it stops.
By ensuring a secure water connection, you’re setting the stage for your dishwasher to perform optimally.
Connecting the Drain Hose
Think of the drain hose as the exit door for dirty water. It’s crucial for keeping your kitchen clean and functional.
1. **Find the Drain Connection**: Usually located at the sink’s drain tailpiece.
2. **Attach the Drain Hose**: Secure it to the dishwasher’s drain outlet and ensure it reaches the sink’s drain.
3. **Use a Hose Clamp**: This keeps the hose firmly in place and prevents leaks.
If the drain hose is not positioned correctly, you might end up with a wet floor, which is something no one wants.
Power Connections
Now, let’s talk about the electrical side of things. This is where safety becomes paramount.
1. **Check the Power Supply**: Make sure the electrical outlet is functional and properly grounded.
2. **Connect the Power Cord**: If your dishwasher requires a power cord, connect it to the terminal block inside the unit.
3. **Secure the Connection**: Ensure all screws are tight before plugging it into the outlet.
Remember, if you’re uncomfortable working with electricity, don’t hesitate to call a professional. It’s better to be safe than sorry.
Testing Your Connections
Once everything is connected, it’s time to test your work. This is where anticipation meets relief.
1. **Run a Test Cycle**: Start the dishwasher and listen for any unusual sounds.
2. **Check for Leaks**: Look around all your connections for any signs of water escaping.
3. **Monitor the Drainage**: Ensure wastewater is draining properly.
If everything checks out, congratulations! You’ve successfully connected your dishwasher, and it’s ready for action.
Common Issues and Troubleshooting
Even with the best installations, issues can arise. Here are some common problems and solutions:
– **Water Leaks**: Often caused by loose connections. Recheck all fittings and tighten where necessary.
– **Poor Drainage**: This might indicate a kink in the drain hose. Ensure it’s not pinched or blocked.
– **No Power**: If the dishwasher won’t start, check your circuit breaker. A tripped breaker can be the culprit.
Conclusion
Dishwasher connections might seem daunting at first, but with the right tools and knowledge, you can tackle the installation like a pro. Remember, securing water, drainage, and power connections is crucial for your machine’s efficient operation. Treat the process like a puzzle—each piece must fit perfectly for the final picture to be complete.
If you ever feel overwhelmed, don’t hesitate to seek professional help. After all, a well-connected dishwasher makes for a happy kitchen.
FAQs
1. How often should I check my dishwasher connections?
It’s a good idea to inspect your connections every six months to ensure there are no leaks or signs of wear.
2. Can I install a dishwasher myself?
Yes, if you have basic plumbing and electrical skills. However, when in doubt, hiring a professional is always wise.
3. What should I do if my dishwasher won’t drain?
Check for kinks in the hose, ensure the drain is clear, and inspect the garbage disposal if it’s connected. If issues persist, consult a professional.