

![SANKALA Airtag Dog Collar Holder, [1 Pack] Waterproof Dog Airtag Holder, Silicone Full Body Covered Anti-Lost Protective Apple Air Tag Holder for Pet Collar - Fits All Width Collars, Black](https://m.media-amazon.com/images/I/71OUyCVjx8L._SS520_.jpg)
![[Ultra Thin] for Airtag Wallet Holder 2 Pack, Airtag Holder, 0.1 inch Thickness, Airtag Wallet Case Slim Thin Card Case for Purse, Handbag, Backpack Wallet, Clutch (Black)](https://m.media-amazon.com/images/I/81oB85KkPRL._SS520_.jpg)


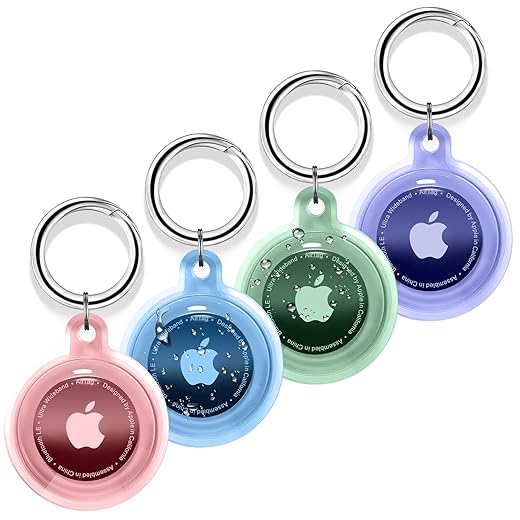
![4 Pack,IPX8 Waterproof Airtag Holder for Apple Air Tags with Air Tag Keychain,Shockproof GPS Cover [Anti-Scratch] [PC+Silicone] Air-Tag Item Finders Case for Pets,Kids,Luggages-Black/Blue/Green/Red](https://m.media-amazon.com/images/I/81hgijk978L._SS520_.jpg)
Getting Started with Your AirTag: A Step-by-Step Setup Guide
Are you tired of misplacing your keys, wallet, or even your favorite backpack? If so, Apple’s AirTag might just be the solution you’ve been waiting for. This small, sleek device is designed to help you locate your belongings quickly and easily. In this guide, we’ll walk you through the setup process, ensuring you get the most out of your AirTag.
What is an AirTag?
Before diving into the setup, let’s clarify what an AirTag is. Think of it as a digital homing beacon, a tiny, circular device that you can attach to your valuables. Utilizing Bluetooth technology, it connects with your iPhone, allowing you to track your items using the Find My app. It’s like having a personal assistant that never sleeps, always ready to help you find what you’ve lost.
What You’ll Need
To get started with your AirTag, you’ll need a few things:
– An AirTag (or multiple, if you want to track several items)
– An iPhone or iPad running iOS 14.5 or later
– A stable internet connection
Once you have these essentials, you’re ready to embark on your AirTag journey!
Step 1: Unbox Your AirTag
First things first: unbox your AirTag. This moment can feel like unwrapping a present, filled with anticipation. You’ll notice a small plastic tab that needs to be removed. Pull it out, and you’ll hear a sound indicating that your AirTag is powered on. It’s like hearing the initial notes of your favorite song—exciting and promising!
Step 2: Bring Your AirTag Close to Your iPhone
Next, take your newly unwrapped AirTag and bring it close to your iPhone. The device uses proximity to initiate the setup process. As you do this, a pop-up notification should appear on your iPhone’s screen, like magic! Tap “Connect” to start the setup.
Step 3: Name Your AirTag
Now comes the fun part—naming your AirTag. You can choose a name that reflects the item you’re tracking, such as “Keys,” “Backpack,” or “Wallet.” It’s similar to naming a pet; it gives your AirTag a personality. You can even select a custom name from the list provided.
Step 4: Choose an Emoji (Optional)
If you want to add a pinch of creativity, you can assign an emoji to your AirTag. This step is optional but adds a fun touch to your tracking experience. Imagine your AirTag as a quirky little character, ready to help you find your belongings.
Step 5: Register Your AirTag with Your Apple ID
Once you’ve named your AirTag, it’s time to register it with your Apple ID. This step ensures that only you can track your item. The security measures in place act like a protective shield, keeping unwanted eyes away from your possessions. Simply follow the on-screen prompts to complete this process.
Step 6: Attach Your AirTag
Now that your AirTag is set up and registered, it’s time to attach it to the item you want to track. Whether it’s slipping it into your wallet, placing it in your backpack, or using a keyring to attach it to your keys, make sure it’s secured. It’s like putting a GPS in your car; once it’s in place, you’re ready to roll!
Step 7: Test Your AirTag
Before you go about your day, take a moment to test your AirTag. Open the Find My app on your iPhone and select the “Items” tab. Tap on your AirTag, and then choose “Play Sound.” If all goes well, your AirTag will emit a sound, guiding you to its location. It’s an exhilarating moment, akin to finding the last piece of a challenging puzzle.
Step 8: Explore Additional Features
Congratulations! You’ve successfully set up your AirTag. But don’t stop here—explore additional features. You can enable Precision Finding, which uses augmented reality to lead you directly to your AirTag’s location if you have an iPhone 11 or later. This feature is like having a treasure map right in your pocket!
Conclusion
Setting up your AirTag is a straightforward process that can save you time and frustration in the long run. By following these simple steps, you’ll be well on your way to keeping track of your belongings like never before. Whether it’s your keys or your favorite bag, an AirTag is a handy companion in your daily adventures. So go ahead, embrace the peace of mind that comes with knowing your items are always within reach!
FAQs
1. Can I use my AirTag with an Android device?
No, AirTags are designed to work with Apple devices. However, if you find an AirTag, you can tap it with an NFC-enabled Android device to see the contact information of the owner.
2. How far can I track my AirTag?
The tracking range of an AirTag is generally around the Bluetooth range of about 30 feet. However, with the help of the Find My network, you can locate your AirTag even when it’s out of Bluetooth range.
3. What happens if my AirTag runs out of battery?
AirTags use a replaceable CR2032 battery, which typically lasts about a year. When the battery is low, you’ll receive a notification on your iPhone, reminding you to replace it.

